

Have you noticed that the woodchips in your play area have become worn out or compacted over time? Don’t worry, there’s a simple solution to bring life back to your play area. By following some easy steps, you can rejuvenate old or compacted woodchips, providing a safe and enjoyable environment for children to play. In this article, we’ll explore the methods that can help you breathe new life into your play area woodchips, allowing you to bring back the joy and excitement of outdoor play.
Understanding the Problem
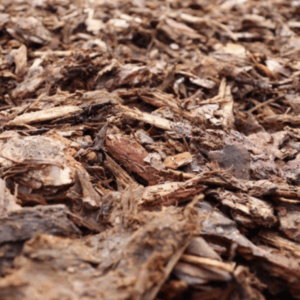
Identifying the Signs of Old or Compacted Woodchips
When it comes to playgrounds and play areas, ensuring the safety of children should always be a top priority. One common issue that can arise in these areas is the compaction of woodchips. Over time, woodchips can become compressed, making the play surface less absorbent and potentially hazardous. So how can you tell if your play area’s woodchips are in need of rejuvenation?
The signs of old or compacted woodchips can include a hard surface that does not yield when stepped on, a thin layer of woodchips, and an uneven distribution of woodchips across the play area. If you notice these signs, it’s crucial to take action to revitalize the woodchip surface and maintain a safe environment for children to play in.
Understanding the Consequences of Neglected Woodchips
Neglected woodchips can pose a range of problems for a play area. Firstly, compacted woodchips can result in reduced shock absorption, increasing the risk of injury from falls. This is particularly concerning as children are more likely to engage in rough play and adventurous activities in a play area. Moreover, compacted woodchips may also present a suffocation hazard and hinder proper drainage, leading to standing water and potential for slips. Neglected woodchips can also detract from the aesthetic appeal of the play area, presenting a less inviting environment for children.
Preparation and Safety Measures
Before rejuvenating your play area’s woodchips, it’s essential to undertake thorough preparation and ensure the safety of everyone involved. This includes inspecting the play area and woodchips, clearing the play area of any debris, and taking necessary safety precautions.
Inspecting the Play Area and Woodchips
Start by conducting a detailed inspection of the play area and woodchips. Look for any signs of damage, such as broken equipment or sharp objects. Check for any potential hazards, like protruding nails or splintered wood, that could harm children. Take note of any uneven spots or areas with significantly less woodchips. This inspection will allow you to address any pre-existing issues and ensure a safe and even surface for rejuvenation.
Clearing the Play Area
Clearing the play area of any debris is an important step to prepare for the rejuvenation process. Remove any loose pieces of equipment, toys, or objects that may be scattered across the play area. Rake away any leaves, twigs, or other organic matter that could interfere with the rejuvenation process. By creating a clean and clutter-free play area, you can achieve optimal results when rejuvenating the woodchips.
Safety Precautions
When working with woodchips and rejuvenating the play area, it’s crucial to prioritize safety. Ensure you have appropriate safety gear, such as gloves and protective eyewear, to protect yourself. If you are working with heavy equipment or chemicals, follow all manufacturer instructions and exercise caution. Additionally, it’s essential to communicate clearly with children and keep them away from the work area during the rejuvenation process to prevent any accidents or injuries.
Loosening the Woodchips
After completing the necessary preparations and safety measures, it’s time to start rejuvenating the play area’s woodchips. Loosening the woodchips is a crucial step in restoring their absorbency and creating a more suitable play surface.
Using a Rake to Loosen the Top Layer
One effective technique for loosening the top layer of compacted woodchips is to use a rake. Start by raking the woodchips in a crosshatch pattern, breaking up any areas that feel particularly hard or compacted. Be sure to remove any debris or large clumps of woodchips that accumulate during the process. By raking the top layer, you are creating space for the addition of new material and allowing the existing woodchips to regain their natural resilience.
Troubleshooting Hardened Areas
In some cases, certain areas of the play area’s woodchips may be especially difficult to loosen. If you encounter hardened patches, consider using a garden fork or similar tool to break up the compacted surface. Insert the fork into the hardened area and gently rock it back and forth to create small openings. This will help to aerate the woodchips and facilitate better drainage and absorption.
Using a Leaf Blower for Light Compaction
If the compaction of the woodchips is not severe, a leaf blower can be a useful tool for loosening them. Set the leaf blower to a low or medium setting and direct the airflow across the surface of the woodchips. The gentle breeze from the blower will help to dislodge any compacted areas and prevent further compaction. Be cautious not to blow away the woodchips entirely, as they are essential for maintaining a safe play area surface.
Adding Fresh Material
Once the woodchips have been sufficiently loosened, it’s time to add fresh material to restore the play area’s surface. Choosing the right woodchips or playground mulch, testing the soil and drainage, and correctly applying the new material are all crucial steps in this process.
Choosing the Right Woodchips or Playground Mulch
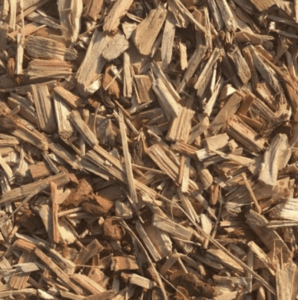
When selecting the woodchips or playground mulch for your play area, it’s important to choose materials that meet safety standards and are suitable for outdoor use. Look for products that are specifically labeled as playground-safe and comply with relevant regulations. Consider factors such as durability, non-toxicity, and the ability to maintain proper drainage.
Testing the Soil and Drainage
Before applying new material, it’s essential to test the soil and evaluate the drainage in the play area. Dig a small hole in various locations across the play area to examine the soil texture and moisture levels. Ensure the soil is well-draining and not excessively compacted. If necessary, consider aerating the soil or making adjustments to improve drainage. Adequate drainage will prevent water accumulation, reducing the risk of slips and facilitating the woodchips’ ability to absorb shock.
Applying a Layer of New Material
Once you have chosen the appropriate woodchips or mulch and assessed the soil and drainage, it’s time to apply a layer of new material. Spread the fresh woodchips evenly across the play area, aiming for a depth of 6 to 12 inches. This thickness provides an optimal cushioning effect and ensures sufficient coverage for the entire surface. Use a rake or shovel to distribute the woodchips, ensuring they reach into all corners and edges. The new layer of material will contribute to the play area’s safety and appearance, providing a fresh and inviting surface for children to enjoy.
Mixing in the Old Woodchips
To maximize the benefits of rejuvenation, it can be helpful to mix in the old woodchips with the new material. Gently rake or rotate the existing woodchips, blending them with the fresh addition. This technique helps to achieve a more consistent surface and promotes a seamless transition between the old and new woodchips. Mixing the woodchips also ensures that the rejuvenation process extends the lifespan of the existing materials, providing long-term value for your play area.
Proper Maintenance
Rejuvenating your play area’s woodchips is not a one-time task but rather a commitment to ongoing maintenance and care. Regularly inspecting and maintaining the play area, monitoring drainage and resurfacing needs, and encouraging proper use will help ensure the longevity and safety of the space.
Regularly Inspecting and Maintaining the Play Area
Set a schedule for regular inspections of the play area to identify any signs of wear, damage, or compaction. Look for any loose or splintered wood, broken equipment, or other hazards that may require immediate attention. Rake the woodchips periodically to maintain their loose and absorbent quality. Remove any foreign objects, such as litter or fallen branches, that may accumulate on the play surface. By staying proactive and addressing issues promptly, you can prevent more significant problems from arising and maintain a safe play environment.
Monitoring Drainage and Resurfacing Needs
Proper drainage is crucial for maintaining the integrity of the woodchip surface. Regularly monitor the play area for any signs of standing water or poor drainage. If you notice areas where water accumulates, investigate and address the underlying causes, such as compacted soil or blocked drainage channels. Additionally, keep a close eye on the woodchips’ depth and condition. Over time, the woodchips may naturally decompose or become compacted. Plan for regular resurfacing as needed to maintain the recommended thickness and optimal safety.
Encouraging Proper Use of the Play Area
Promoting proper use of the play area amongst children is an essential aspect of maintenance. Educate children about the importance of playing safely and respectfully, emphasizing the need to avoid rough or dangerous behavior. Encourage children to avoid throwing woodchips or intentionally redistributing them to maintain an even and safe surface. By fostering a culture of proper play area etiquette, you can help preserve the rejuvenation efforts and ensure the ongoing viability of the woodchip surface.